I don't have much to share crafting wise today, but here are a couple news stories from today & this weekend I thought I would share.....
It doesn't rain much here in SoCal, so when I saw these clouds on the horizon I got really excited....
but...
No, they aren't rain clouds...
That's just Los Angeles burning again...
Another story that I just read on the news this morning....
Disney to buy comic book powerhouse Marvel for $4B
I don't know how I feel about this... My parents owned a Comic Book shop when I was growing up. It was back in the early 90's (comics come & go in popularity every 10 years). It was great, & I really think that Marvel has brought itself back from the mess it was in in the late 90's. Their movies are (mostly) all blockbusters. I don't share political views very much, but this story kinda makes me sad. Why does Disney have to own everything? I think that giant corporations sometimes do more harm than good. I like the products that Disney puts out, but I'm scared for the future of Marvel. I guess they let Pixar do what-they-do, without coming in & taking over the whole operation. So there is hope! Very interesting... The article says that Disney wants to get more of a foothold on the young male demographic, why don't they just do some market research & come up with their own ideas? Well, I guess you could look at it like this...
"Congrats Stan Lee!"
Monday, August 31, 2009
News 'n Stuff
Labels:
Comic Books,
Everyday Stuff,
Los Angeles,
News
Friday, August 28, 2009
I am so Smart...
S-M-R-T... I mean S-M-A-R-T!!!
Ok, if you have read my blog for any amount of time & you've looked over any of my tutorials, you'll know that I am ALL ABOUT finding a easier, faster way of doing things. It's not that I want to skimp on quality & rush through my felting, but I just think to myself,
"There has to be a better way of doing this...."
So, for now at least, I think I've found a reasonable solution to speed up covering foam & "core wool" bases with the nice top wool layer. If you checked out my Angler Fish posting, you noticed how frustrated I got at the wet felting stage. It was basically a giant mess trying to felt all of that wool on top of the foam. It was soggy & limpy & took forever. Well... I figured out the awesomeness of Pre-Felt!!! Pre-Felt will be a life & time saver. Many of the wet felters have know the glory of Pre-Felt for a while, but I think this technique can be applied to those needle felters too!!! It's kinda like when you pre-felt little tufts of wool by hand before doing your top-coat. This just makes a whole-lotta tufts for you to use!!
Making sheets of thin Pre-Felt, which can easily be torn into smaller pre-felted bits can be made of any wool, in any color. I've been making sheets for a couple of days to kind of stock pile them for future sculptures. A little prep work now will save me a TON of time later. Plus I like wet felting, it's kinda a stress-reliever for me. Very Zen-like.....
*** I was just reading over my post & thought I'd add a little bit of info for you. This might not work for everybody... It works for me cause I tend to work on a larger scale than other needle-felters. I love making giant things, using lots of wool. But, if you tend to work smaller & are overwhelmed by making larger items, maybe you can see how easy it is to take a few easy steps to keep the work load manageable.
Making Pre-Felt Tutorial!!!
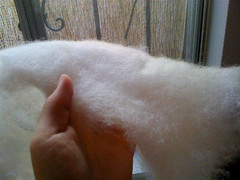
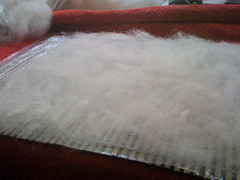
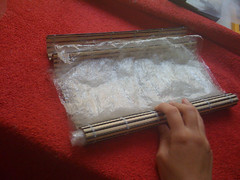
Like my new felting mat? I just got it, it works better for more subtle felting than my bamboo sushi mat. Be sure to put a sheet of plastic wrap down over the mat for clean & neat working of the pre-felt sheet. Lay out thin tufts of wool in multiple layers for your pre-felt. I use 2 layers to keep my felt thin, this is a good thickness for using for needle-felting.
Be sure to alternate the directions of the wool fibers. Go between horizontal & vertical. Also check to be sure that you wool is even & there aren't any bald spots. Add a little extra tuft to any thin areas that might pull apart & leave you with a felty hole.
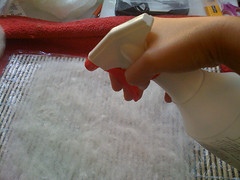
Now spray it down with some warm soapy water. Be sure to thoroughly wet the wool, I use the sprayer because it doesn't disturb the layout of the fibers. Next, cover with a layer of Tulle or netting. This also allows you to work the fibers with out disturbing the layout. Unfelted wet wool can be a bit unruly & sticky. The tulle just lets you work it in place.
Create avatar
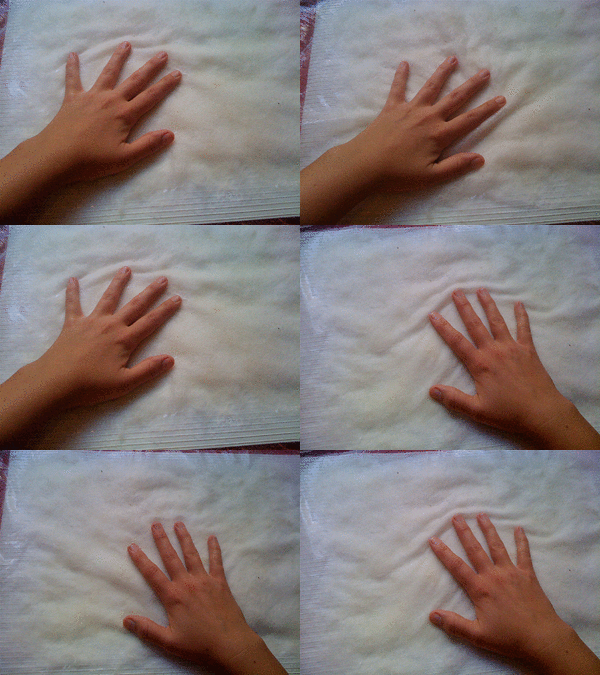
Now it's time to SOFTY rub & scrub. You don't need to work the wool that much, for that long. You really only want to just get the fibers to mingle enough to keep it's shape. You can use a kind of vibrating motion. Small movements, back and forth, working all over the sheet.
Now is what I read in a felting book called "The Pinch Test". This just lets you see how much the fibers are felted. If you pinch the very top fibers & you get a kind of peak of fibers that come up with it, then you are done! If the felt pulls apart, then work it just a little more. You kind of want a "skin" of felted fibers, not a solid sheet of felt. When done, just roll up the sheet inside the plastic wrap & rinse out the soap. I like to pour water down through the open ends & wash out the soap. Let air dry.
I tend to over felt my wool (always), but pre-felt is awesome cause you can just brush the surface a little & loosen the fibers. You can also thin it out by pulling it a little. Now you have a fluffy piece of feltable Pre-Felt to use for all your felting needs!!
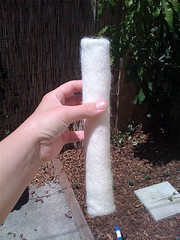
Here's an example of how I used a sheet of Pre-Felt. I took a cylinder shaped tube of foam & rolled it up inside the Pre-Felt. I needled the wool just enough to keep it in place. Then I wet felted it in hot soapy water, using my new felting mat, and in just a couple of minutes... DONE!!
Hope this gives you some ideas, & I hope everybody has a great weekend!!!
Ok, if you have read my blog for any amount of time & you've looked over any of my tutorials, you'll know that I am ALL ABOUT finding a easier, faster way of doing things. It's not that I want to skimp on quality & rush through my felting, but I just think to myself,
"There has to be a better way of doing this...."
So, for now at least, I think I've found a reasonable solution to speed up covering foam & "core wool" bases with the nice top wool layer. If you checked out my Angler Fish posting, you noticed how frustrated I got at the wet felting stage. It was basically a giant mess trying to felt all of that wool on top of the foam. It was soggy & limpy & took forever. Well... I figured out the awesomeness of Pre-Felt!!! Pre-Felt will be a life & time saver. Many of the wet felters have know the glory of Pre-Felt for a while, but I think this technique can be applied to those needle felters too!!! It's kinda like when you pre-felt little tufts of wool by hand before doing your top-coat. This just makes a whole-lotta tufts for you to use!!
Making sheets of thin Pre-Felt, which can easily be torn into smaller pre-felted bits can be made of any wool, in any color. I've been making sheets for a couple of days to kind of stock pile them for future sculptures. A little prep work now will save me a TON of time later. Plus I like wet felting, it's kinda a stress-reliever for me. Very Zen-like.....
*** I was just reading over my post & thought I'd add a little bit of info for you. This might not work for everybody... It works for me cause I tend to work on a larger scale than other needle-felters. I love making giant things, using lots of wool. But, if you tend to work smaller & are overwhelmed by making larger items, maybe you can see how easy it is to take a few easy steps to keep the work load manageable.
Making Pre-Felt Tutorial!!!
Like my new felting mat? I just got it, it works better for more subtle felting than my bamboo sushi mat. Be sure to put a sheet of plastic wrap down over the mat for clean & neat working of the pre-felt sheet. Lay out thin tufts of wool in multiple layers for your pre-felt. I use 2 layers to keep my felt thin, this is a good thickness for using for needle-felting.
Be sure to alternate the directions of the wool fibers. Go between horizontal & vertical. Also check to be sure that you wool is even & there aren't any bald spots. Add a little extra tuft to any thin areas that might pull apart & leave you with a felty hole.
Now spray it down with some warm soapy water. Be sure to thoroughly wet the wool, I use the sprayer because it doesn't disturb the layout of the fibers. Next, cover with a layer of Tulle or netting. This also allows you to work the fibers with out disturbing the layout. Unfelted wet wool can be a bit unruly & sticky. The tulle just lets you work it in place.
Create avatar
Now it's time to SOFTY rub & scrub. You don't need to work the wool that much, for that long. You really only want to just get the fibers to mingle enough to keep it's shape. You can use a kind of vibrating motion. Small movements, back and forth, working all over the sheet.
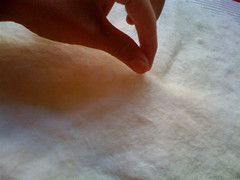
Now is what I read in a felting book called "The Pinch Test". This just lets you see how much the fibers are felted. If you pinch the very top fibers & you get a kind of peak of fibers that come up with it, then you are done! If the felt pulls apart, then work it just a little more. You kind of want a "skin" of felted fibers, not a solid sheet of felt. When done, just roll up the sheet inside the plastic wrap & rinse out the soap. I like to pour water down through the open ends & wash out the soap. Let air dry.
I tend to over felt my wool (always), but pre-felt is awesome cause you can just brush the surface a little & loosen the fibers. You can also thin it out by pulling it a little. Now you have a fluffy piece of feltable Pre-Felt to use for all your felting needs!!
Here's an example of how I used a sheet of Pre-Felt. I took a cylinder shaped tube of foam & rolled it up inside the Pre-Felt. I needled the wool just enough to keep it in place. Then I wet felted it in hot soapy water, using my new felting mat, and in just a couple of minutes... DONE!!
Hope this gives you some ideas, & I hope everybody has a great weekend!!!
Thursday, August 27, 2009
OOOHH!! Forgot!
I forgot to post a link to an awesome blog that featured my felted sushi yesterday!!! Be sure to take a moment & stop over and check it out!!!
Trouble & Trifle - They have a great blog covering all sorts of fun stuff from Art, to Pop Culture, to Their super cute Dog!!
More New Work!!!
Just wanted to share some more new work that I have finished off. I'm starting to work on more than one project at a time. This way I can jump back & forth while the other's drying or I'm sick of looking at it. It's working out pretty well. I've also found a new SUPER AWESOME technique that I will share with you tomorrow. I think it might be a way to really up-the-pace of my needle felting. I think that is one disadvantage that we, as felters, have against the competition. We have to charge so much for our labor intensive work. I may have found a way to speed things up... just a little bit.
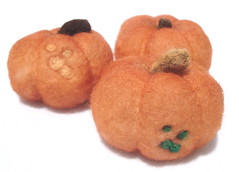
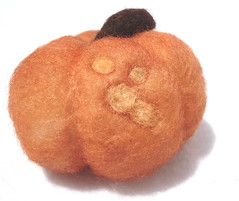
New pieces!! Here are some new needle felted pieces that I will be listing in my shop in the next couple days. They are super cute & ready just in time for Fall!!! They are super cute mini pumpkins!! They are about 2 1/2" in diameter, needle felted with white Romney wool, then airbrushed with orange fabric & acrylic paints!! They will be listed in my Etsy shop for a very affordable price - probably around the $15 range!!!!
Wednesday, August 26, 2009
JellyFish is DONE!!
Yea! I'm very excited to present the finished JellyFish! Just to give you a brief description of what he is...
JellyFish - This sculpture is made of thin sheets of Nuno Felt with white Romney Wool & White Tulle. He was then needle felted over a stiff wire armature. He has glowing "El Wire" inside his tentacles that glows bright blue in dim light. The "El Wire" runs on 4 AA batteries & the controllers are stored inside a drawstring pouch that is sewn beneath the mess of tentacles at the bottom, which also helps create a stable base. Once sculpted he was airbrushed with fabric & acrylic paints.
I love how the photos in the dim light turned out!! I like how you can see how the "El Wire" really glows. So neat!! I really wanted to make something... pretty, or beautiful. I wanted it to be all flowy & pink. I am happy with how it turned out. I will be listing him in my Etsy shop at some point today. I think I've officially outgrown the target handmade market of Etsy & should really be focusing on more fine art. My pieces are just becoming too expensive to really sell, but I will have a few affordable pieces coming up in the near future!!!
Labels:
Etsy,
Featured,
felt,
Felted Animal,
Jelly Fish,
Needle Felt
Monday, August 24, 2009
Good Morning!!!
Hope everybody had a great weekend! I got alot done this weekend, work-wise, but still need to take pictures, so I'm a big-fat-liar about posting picts of the JellFish. He's sitting here on my kitchen table staring at me... almost done... I think.... maybe just a little bit more work... So hopefully I will take picts of him today, or finish him & have picts tomorrow.
But in the mean time I thought I'd do one of the BlogCarnivals that the Etsy team I'm apart of loves to do. They are fun cause the topics are interesting & force me to share more personal information about myself, instead of just the regular old crafty stuff that I usually stick to. So today's topic is...
"Your favorite food. What is it and why? If it's something you make please share the recipe."
My favorite food has pretty much always been Biscuits. Yep, like the yummy buttermilk kind you get at KFC. They melt in your mouth kinda like peanut butter.
BUT...
In the last year I have a new favorite...
SPAM MUSUBI!!!
Ok...
Do you like sushi?
Do you like salty meat like bacon?
Then PLEASE PLEASE search out your nearest Hawaiian BBQ restaurant and order up some Spam Musubi.
OMG...
I crave this stuff now. It's soooo delicious. I really need to get on top of buying myself a rice cooker & learn how to make this at home. The key to making some good sushi is the rice. So if you ever want to try your hand at it, be sure that you only buy "CalRose Rice" It's the one with the red rose on the package, it's Japanese Sticky Rice. You can also use it to make yummy food filled rice balls. This little tip from the lips of my boyfriend's Hawaiian Grandmother. She made spam musubi a couple weekends ago, and we ate all the left overs the next day.
This is also a great Baby-Step for those of you that are kinda scared of taking the jump into traditional sushi. The spam is cooked & there isn't that much seaweed. And if you are one of those stuck-up snobs that thinks Spam is beneath them... Get over it! Why deny yourself one of the most delicious foods in the world cause the meat comes in a can?
Have you ever actually tried Spam?
It's YUMMY!!!
Here's a link to a simple Spam Musubi Recipe. Maybe I'll look into trying this out this week....
Labels:
Everyday Stuff,
Food,
fun facts,
Sushi
Friday, August 21, 2009
um... I got noth'n....
Well, I don't really have much to share, but thought I'd post today anyways, although later than usual. I am FINALLY finishing the paint job on the jelleyfish today. Of course I decide to paint on the one day in Southern California that it happens to be cloudy. It looks like it almost kinda sorta wants to rain. My luck....
Went to visit my Aunt in the hospital yesterday. She is looking well & hopefully will get to go home today or tomorrow. She rushed to the hospital in such a hurry she didn't have anything to occupy her time. So I brought her a fun grab-bag full of stuff to keep her busy. I got her a jigsaw puzzle, crossword & word-search books, a trashy novel (my mom's suggestion), some crayons & pens & pencils, a deck of cards, some mouth wash, & other stuff I can't think of. It was fun shopping for her & finding all sorts of fun stuff to buy!!
I am making some presents for the family (& a couple to sell in the shop) that I am also painting today. I'm trying to be proactive & make some seasonal stuff before the season has already past!! So you guess what they are, they are white here, but I think you get the picture.
Hopefully I'll have final picts of the JellyFish to share on Monday!! If the clouds & rain stay away, that is. I love rainy days, you miss them when you don't get them that often!
Labels:
Everyday Stuff,
Family,
felt,
Holidays,
Needle Felt
Wednesday, August 19, 2009
Sorry been lazy...
I haven't posted much this week. I did work on the JellyFish this weekend, but not done yet. Hopefully I can get motivated enough to finish, or mostly finish him off today. Just trying to get some things straightened out around here like cleaning, getting health insurance, hiking, etc.
I will share something I saw on the Craft Gossip Blog earlier & went out and bought the issue....
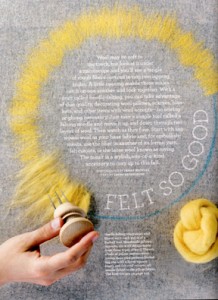
For all you needle-felters out there, be sure to grab a copy of this month's Martha Stewart's Living. There is an article about needle felting!!! Love for us felters!!
I will share something I saw on the Craft Gossip Blog earlier & went out and bought the issue....
For all you needle-felters out there, be sure to grab a copy of this month's Martha Stewart's Living. There is an article about needle felting!!! Love for us felters!!
Friday, August 14, 2009
Friday Teaser....
So I should be finishing up the Jellyfish by Monday, hopefully!! Hope everybody has a great weekend. We are going over to my boyfriend's mom's house for lunch tomorrow & I want to see "District 9" at some point this weekend. So just going to leave you with a little JellyFish teaser...
Neat, huh?!?!?
Neat, huh?!?!?
Thursday, August 13, 2009
New Drawing & Nuno Felt!
So I've been half as lazy as I was last weekend, been doing a couple things here & there. Yesterday I decided to photograph a short tutorial on a process I'm using for my newest Felted Sculpture....
JellyFish -
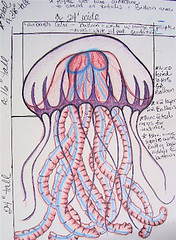
So here's a drawing of the newest sculpture I'm working on. I've been working on it for about a week, and honestly, could be pretty much done by now, but I'm lazy. The real sculpture doesn't look much like this anymore, due to some restrictions with the electronic parts. He will have glowing wire inside the tentacles. It's made of this awesome coated wire that glows blue when turned on. It'll be awesome, trust me....
MY NUNO FELT TUTORIAL -
So I'm not sure if this can technically be called Nuno felt, maybe I just don't felt it enough to be proper Nuno, but it is based on the same idea. Felting a thin layer of wool over & onto a fabric base. I wanted some transparent felt that I could use to make the JellyFish, so I tried my hand at Nuno. For every new sculpture I like to try a new technique. I think I like to do this cause then it just adds one more tool to put into my felting belt. Then I can pull these different techniques out of my butt later when I need them!!!
I used a small weave of white Tulle as my fabric base. I figured that the wool would be able to work it's way through the open holes in the netting. I cut the tulle into smaller, manageable sized pieces. This whole process goes really fast, well the actual felting part does, & I think it helped me practice wet felting more.
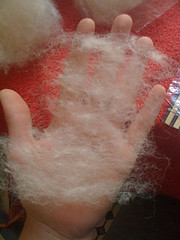
Now I took my trusty White Romney wool (which I need to reorder cause I'm almost out) and pulled it out into VERY VERY thin tufts. I tried to keep it very even & about the same thickness, pulling out all the chunks of Veggie Matter & felted knots. This part takes the longest, but if you work carefully at the start, it makes the rest of the process really easy.
All the thin white Romney laid out in a thin layer over the Tulle. I also was sure to put a sheet of Plastic Wrap under the Tulle before I started. This just helps keeps all the water & wool & mess contained. I put another sheet of Plastic Wrap over top of the wool, to help keep the fluffy tufts in place while you felt.
Now I used a spray bottle to squirt a mist of warm soapy water over the wool. The mist doesn't disturb all your hard work of laying out the layer. Now put the Plastic Wrap over top & press out the air.
Now it's time to Roll, Roll, Roll....
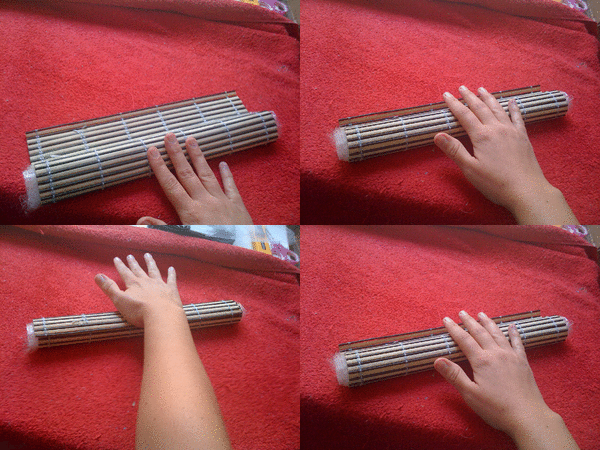
Be sure to roll & unroll the felt in the Bamboo Sushi Mat, turning it in all different directions, and flipping the felt over. This just makes sure the wool gets felted in a even manner. I found also that if you want to make a larger piece of felt bigger than the mat, you can fold it in half. Be sure to unfold & refold the wool here too. Takes a little longer for it to felt, but not bad.
And I'll leave you with a SUPER FUN GIF animation, just cause I think they are funny!!
Create avatar
Tuesday, August 11, 2009
Playing with a new toy!!
So yesterday afternoon I got to play with an old (but new to my felting) toy. I've been putting off playing around with it cause we have wasps that like to hang around the back yard & I am deathly afraid of getting stung. But I've found that if I don't wear bright colors & go outside in the late afternoon, they don't bother me. So I pulled out my airbrush!! I've been wanting to play with it since I was working with the dye for the Angler Fish. The techniques that I was using then would have been alot easier with an actual airbrush. I also bought a starter set of fabric paints, cause I don't the dying process didn't work out for me that well.
So I started playing with some watered down fabric paints. It was fun & fast. I think it will work well for the kind of color I like to paint onto my sculptures. I always like to go with a gradated, soft painterly color, then I add the accent colors after with colored roving. So I'm excited about the potential for this!! And thank God for my pack-rat-of-a-boyfriend who saves everything. That's his air-compressor. It's old, but great for what I need it for!!
I'm going hiking this morning, then maybe I'll be more motivated to work on my new sculpture more. I'm almost ready to start the painting process for part of it, so hopefully by this afternoon I can start on that. I've been feeling kinda sluggishwhich is just a horrible cycle, cause you feel sluggish, then you sit around and do nothing, then you feel even more gross for not doing anything, then you definitely don't feel like doing anything productive. I just need to pick myself up, dust myself off, & start fresh. Today's a new day!!
Monday, August 10, 2009
Etsy's - memoriesforlifesb
Hope everybody had a great weekend! We didn't do much really. I worked a bit on my newest sculpture, which hopefully I can have some update pictures of today. I was going to try out a brand new technique, but since the wasps were trying to dive-bomb me outside, I didn't get to play with it. I think it will work out really well, so tomorrow I'll share more. So I thought today I would share my monthly Featured Etsy seller and fellow blogger....
memoriesforlifesb on Etsy
memoriesforlifesb Blog
This amazing artist makes some very beautiful and very fun hand-made scrap book albums. I love how she makes her own albums from scratch. it reminds me of when I took book-making in college & all of the fun techniques I learned about book binding & laminating album covers. But memoriesforlifesb takes all of those basic techniques and has come up with some very unique and creative items.
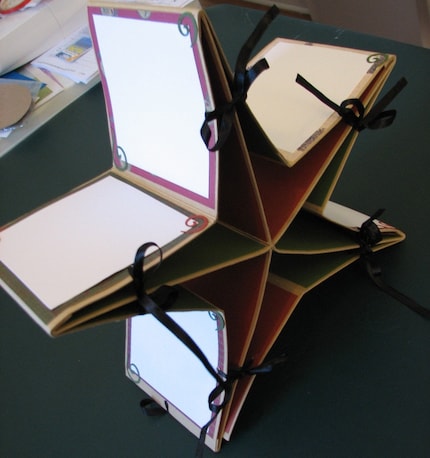
I love this album. It's a great sculptural scrapbook that can sit on any surface, a desk or table or mantel. I like how it very elegant, plus you can customize it anyways you'd like.
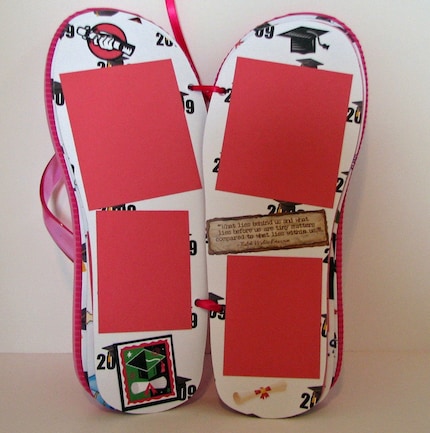
And this item is super cute and really really really creative. It's a scrapbook album that's made from flip-flops!! This one is for your recent grad, but she also makes custom book, and I think this would be great to remember you favorite beach vacation!!!!!
So please check out her shop & blog!!! I also wanted to leave you with a picture of my very first Flower from my Plumeria tree!!! I had 2 blooms before, but one fell off, not sure how, but there are a few more starting to bloom up, but I think it's beautiful!!!
memoriesforlifesb on Etsy
memoriesforlifesb Blog
This amazing artist makes some very beautiful and very fun hand-made scrap book albums. I love how she makes her own albums from scratch. it reminds me of when I took book-making in college & all of the fun techniques I learned about book binding & laminating album covers. But memoriesforlifesb takes all of those basic techniques and has come up with some very unique and creative items.
I love this album. It's a great sculptural scrapbook that can sit on any surface, a desk or table or mantel. I like how it very elegant, plus you can customize it anyways you'd like.
Star Shaped Scrapbook Photo Album - $20
And this item is super cute and really really really creative. It's a scrapbook album that's made from flip-flops!! This one is for your recent grad, but she also makes custom book, and I think this would be great to remember you favorite beach vacation!!!!!
Graduation Flip Flop Scrapbook Album - $20
So please check out her shop & blog!!! I also wanted to leave you with a picture of my very first Flower from my Plumeria tree!!! I had 2 blooms before, but one fell off, not sure how, but there are a few more starting to bloom up, but I think it's beautiful!!!
Friday, August 7, 2009
RIP - John Hughes...
So sad, if you haven't heard, the 1980's teen-movie making icon John Hughes died yesterday. I grew up watching all of his movies, and we even watched "Breakfast Club" last night to show our respect. John Hughes was mainly known for his teen movies like "Sixteen Candles" but here is the list of the some of the movies he wrote during the 80's....
Home Alone (1990)
Christmas Vacation (1989)
Uncle Buck (1989)
The Great Outdoors (1988)
Planes, Trains & Automobiles (1987)
Ferris Bueller's Day Off (1986)
Pretty in Pink (1986)
Weird Science (1985)
European Vacation (1985)
The Breakfast Club (1985)
Sixteen Candles (1984)
Vacation (1983)
... aka National Lampoon's Vacation
Mr. Mom (1983)
*sniff*sniff* There are so many on this list that are my family's favorties!! We watch "Christmas Vacation" every year, "Planes, Trains, & Automobiles" I think was voted our official Family Movie, "Werid Science" is probably my personal favorite, and my dad and I just watched "National Lampoon's Vacation" when I was in Dallas visiting. Can you believe the influence of one man on movies, especially in the Comedic Genre.
Please have a great weekend, and maybe sit down and watch you favorite John Hughes movies, with you kids if you got 'em. Gotta pass his genius onto the next generation...
Vacation (1983)
Lasky, Guard at Walleyworld
"Sorry folks, park's closed. Moose out front shoulda told ya"
Thursday, August 6, 2009
My first FP on Etsy!!
So was bored last night & was playing around on Google Analytics. I noticed that I had like 400 views yesterday and tried to figure out why!?!?! I figured out that I made the Front Page of Etsy for the first time!! YEA ME!!! Awesome... but didn't sell anything... but still AWESOME!
Just wanted to share my very first FP with you!!! (Mine's the "OMG (re)GIFT BAG" in the top right corner!!)
Cheers! And here's to many more for me & to all my Etsy Friends!!!
Just wanted to share my very first FP with you!!! (Mine's the "OMG (re)GIFT BAG" in the top right corner!!)
Cheers! And here's to many more for me & to all my Etsy Friends!!!
Wednesday, August 5, 2009
More Picts of Angler Fish!!!
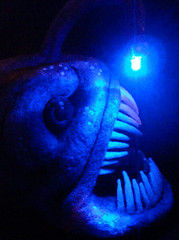
So finally got to take some night shots of the Angler Fish last night. Usually I become a pumpkin once the sun goes down, but last night I got the picts. I went out right at dusk, so at the beginning I got some pictures of the Angler with the fading light (you can still see details & color), and by the end I got pictures being lit only by it's blue LED light. I like how they came out!! Very excited! I think I will list him on Etsy today, but just to warn you, he will be super expensive. I got an email from a potential customer yesterday asking if I could lower my prices. I was very flattered that she loved my work & felt really bad that I couldn't justify lower the price. I accept that my sculptures are very expensive & they might not sell quickly... if they ever do... I'm o.k. with that. Sure I'd like the money, but I am very proud of my work, & hope that my fellow artists don't undervalue their hard work just for the sake of making money. I am working hard to build my portfolio for applying to Grad school, so unfortunately I'm not making smaller, cheaper pieces at this time. I just want people to enjoy my work, if someone buys something - GREAT! But if not... I'll just be eating Mac & Cheese for ever - HAHA!!!
I like the super dark pictures. The fish looks really creepy!! HAHA!! Fun Stuff!!!
Labels:
Angler Fish,
felt,
Felted Animal,
Needle Felt
Subscribe to:
Posts (Atom)