Friday, May 28, 2010

Almost Done!!

Here is the completed picts for the felting part of the Sparrow Sculpture. Just finished all the sculpting, and just need to finish the wood base so it can hang. Should finish it tomorrow... and have finished picts!!!

Sparrow Process 16


All the felting done!! Line work is fun, but takes a little time.


Sparrow Process 17


Detail of finished felting.


Sparrow Process18


Time to put it all together! Just cut a small hole to allow the armature wire to slip through the felt to the back.


Sparrow Process19


Felting the wings on!


Sparrow Process 20


All done & ready for it's wood base. Just laid it on the wood....


Sparrow Process 21


And traced around the outside. I like this look cause it will be like a bold black outline around the whole thing. And gives me a way to hang it!


Sparrow Process 22

Outline ready to cut out. It was too late tonight to jigsaw the wood (little kids living next door) but will cut it out first thing in the morning!


Have a Great Memorial Day Weekend!!
Be safe & eat lots of BBQ!!!! Yea Summer!!

Thursday, May 27, 2010

A Long Day of Felting!

I worked most of today, it felt good to get some work done cause I've been kinda lazy recently. So I shared the first process picts for my newest piece yesterday, so I thought I'd continue! Here was today's progress picts for the Tattoo Sparrow Felted Sculpture!

Sparrow Process 1


I started by sketching a pattern for the wings. I wanted both to be the same, so I made a drawing to cut the wool-felt from.


Sparrow Process 2


I traced the pattern of the wings on some pre-felted white wool. This is my new favorite material to make things go faster. Instead of felting wool from scratch into a thin shape, I just use the pre-felt & needle on top!!


Sparrow Process 3


I want one of the wings to come off the base into 3d, so I felted the armature wire into the wing. This helps with support & posing.


Sparrow Process 4


Both wings all cut & ready for color!


Sparrow Process 5

I used my handy new PhotoShop Elements to scale the original concept drawing up to the size of the wings. I like the shape of the body that I drew before, so I just printed it out to be able to use as a pattern.


Sparrow Process 6


This is another great reason to have the pattern. I cut it up to insure the shape & placements of the different colors.


Sparrow Process 7


I wanted the blue color on the body of the bird to be slightly thicker than the rest, so I just added a layer of white wool to add a little bulk.


Sparrow Process 8


Time to start the color!!!


Sparrow Process 9


I'm a sucker for some nice clean lines & graphic elements in my pieces, so I took the time to sculpt in the colored highlights. I wanted to have some white at the bottom of the wings.


Sparrow Process 10


After much needling, I finished all the blue! It was alot of needling!!


Sparrow Process 11


I then used the body pattern to sketch in the placement for the red under-belly color.


Sparrow Process 12


Fun color on the body is done!


Sparrow Process 14


All the color is done! Looking good!


Sparrow Process 15


Time for the line detail! Just using my handy black wool yarn to felt in the bold black lines around the shapes...

It was a long day & I'm done working, but he is coming along nicely!!

Wednesday, May 26, 2010

I dye with iDYE!!

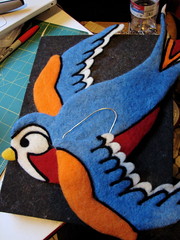
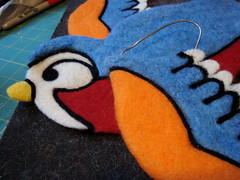
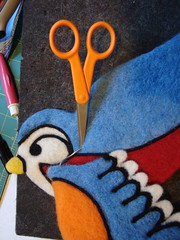
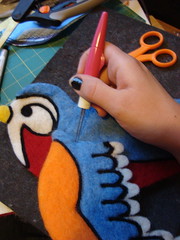
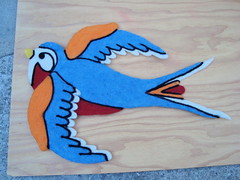
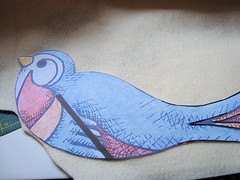
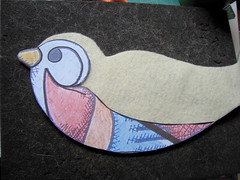
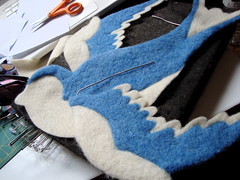
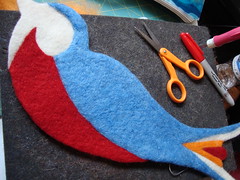
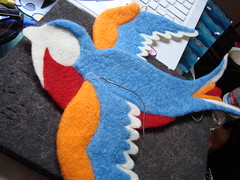
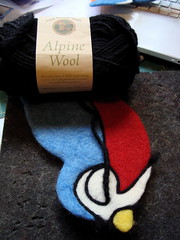
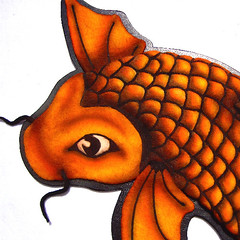
So here is a short tutorial on how to dye some wool using Jacquard's iDye. I wanted to start another series of process picts for my newest sculpture. So in the coming days (or weeks depending on how fast I get this piece done) I will be showing the complete process of creating my newest Felted Sculpture A Tattoo-Inspired Sparrow. Sh here is the first step....

I dye with iDye...

I dye with iDye 1
Start by pre-soaking your wool in a warm bath of water with a splash of vinegar. Pre-soaking your wool helps the fibers open up & gets them ready to receive the dye. It also helps with getting a nice even overall dyed color.


I dye with iDye 2

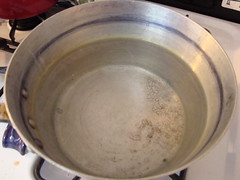
While your wool is soaking, get you pot of hot water started on the stove. I have a specific pot that I use for dying so that I don't make stew or something that ends up slightly blueish in color.


I dye with iDye 3


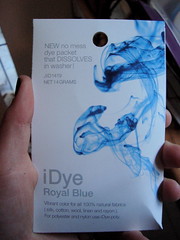
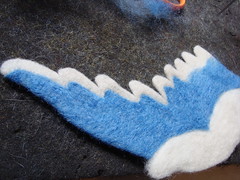
I wanted to dye my wool a nice blue color. Be sure to check out these iDyes cause they have so many yummy colors made for natural dyes. They are technically made to be thrown into you washing-machine, but I've found it's super easy to use them on the stove top!


I dye with iDye 4


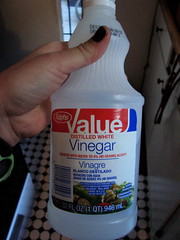
You will be adding some white vinegar to the pot of hot water. This is used as the dye's MORDANT, which is to help set the dye in the fibers. I'm not quite sure of all the science-type stuff on it, but it has to do with attracting the dye molecules and affixing them to the individual wool fibers. You can use this method with cotton fibers, the only difference is that you will use Salt as the Mordant!


I dye with iDye 5

Now add your dye to the pot. Since you are controlling the amount of dye for the wool, you can add as little or as much depending on how saturated you want the color to be. I wanted a medium (not too light, not too dark) so I added a little bit, then added more about 1/2 way through.


I dye with iDye 6


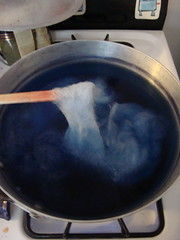
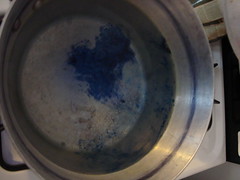
So add the dye, add the vinegar, then add you wool! Be sure to gently stir the wool through the time of dying. You don't want to aggressively stir the wool cause it will start to felt (which I have done) but you want to be sure to move the fibers around. This will help with getting even color coverage.


I dye with iDye 7


Now let the wool sit & cook for about 1/2 hour.


I dye with iDye 8
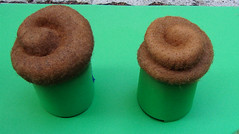
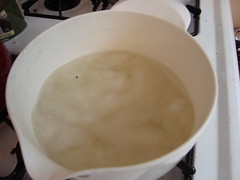
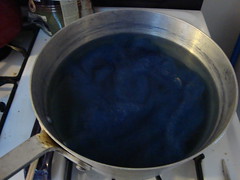
All dyed! You will be able to see if the dye has been completely soaked up by looking at the left-over water. It should be fairly clear. If your water is still dark or opaque, then you either added too much dye & your fiber can't take anymore, or you need to leave it in the water for longer. I've also just pulled wool out after a short time cause I wanted a lighter color *This may cause bleeding because the dye has not had time to set.

I dye with iDye 9
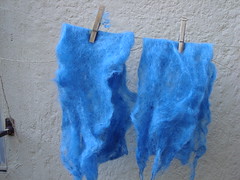
All done & just hanging up to dry. Should be ready for me to use tomorrow. I have a home-made clothes line hanging outside my window with some twine & clothes pins. Not that pretty or strong, but just perfect to hang tufts of wool!!

I love dyeing wool because I get to control what colors I make, but also get surprised & inspired by anything that I wasn't expecting!

Monday, May 24, 2010

Sorry...

I haven't blogged in like a week! This last weekend was super busy, but fun! Got to spend some time with my brother, so now I'm trying to catch up on all my missed emails & blogs.

I thought I'd share a little something I came across last night. I was reading something on a blog... which led me to another website... then I came across a link... etc...

But I found this video showing painter Mark Ryden's process of creating a beautiful piece. I guess I have always like Ryden's work, and after seeing this video, I like him even more. I enjoy seeing process pictures of art. I enjoy seeing the awkward phases of a piece, where you think it looks horrible, but then turns out amazing in the end!


I also love seeing how many reference pictures he uses while painting!! I'm such a fan!

Wednesday, May 19, 2010

New Computer Toy!!

So I downloaded a Trial version of Photoshop Elements. My (kinda) old & well loved MAC has no paint program or graphics program which makes it hard to make basic graphics for Felted Chicken. I just wanted to tell you that I think I'm liking Photoshop Elements... ALOT!! I know it's lame, but I'm really excited about updating my graphics (avatar & Etsy Banner) all professional-like. It's still the trail version, but I think for the price of like $80 it's totally worth making my life easier. So if you don't have a nice program for working on your graphics, maybe check out the P.S. Elements program. And if anybody has experience with it, let me know what you think & maybe some expert's tips on working with it!!!

Here is a comparison of what my original Avatar looked like before and after a little work in Photoshop Elements!!! I think you can totally see the difference!! The "after" jpeg just looks so much better & cleaner & brighter!!! It's the little things that make me happy!!

Monday, May 17, 2010

Airbrush Process!

I haven't posted many process pictures recently except for the Koi, so I thought I'd share some with you today. I was asked a while ago to put together a Airbrushing Process Tutorial for the Dabbled Blog. Nancy was kind enough to have me guest blog with this tutorial!! I haven't posted a tutorial in soooo long, I thought I'd repost it here & give a Shout-Out to Dabbled!!


Airbrushing some Chocolate Frosting!!!


Airbrushing a Cupcake 1

Here are all the supplies you need to help paint & shade your Felted Sculptures!!

*Airbrush, Compressor, & bottles
*Watered down Acrylic Paint
*Yummy Felted Cupcakes!!


Airbrushing a Cupcake 2

This is what the cupcakes look like BEFORE any paint has been sprayed. Just plain white frosting all ready to be transformed into Chocolate!!


Airbrushing a Cupcake 3

I didn't want to get any over-spray of the brown onto the "cake", so I put a little paper & masking tape to cover that part.

First layer of color a warm yellow!!


Airbrushing a Cupcake 4
I like to paint in light layers of many different colors. I think this gives the colors more depth instead of just blasting a single color on to the wool. Also if you get to much acrylic paint onto the wool, it tends to bleed & get a little crunchy.


Airbrushing a Cupcake 5

Slowly getting darker & darker!! Going from the yellow base to a warm brown.


Airbrushing a Cupcake 6
Starting to look like chocolate with the darker brown!! This could pass as a Milk Chocolate, but I want a darker frosting.


Airbrushing a Cupcake 7


Working with the darkest (almost black) brown to add some dark shadows within the twirl.


Airbrushing a Cupcake 8

Yummy Yummy!!! Looking Delicious!! Love the dark shading in the creases!!

Almost done just need....


Airbrushing a Cupcake 9


Cherries On Top!!! Yea! All done!

Friday, May 14, 2010

Being Inspired... Part II...

So I spent the morning & early afternoon trying to get inspired by drawing in my sketch book! I finished a couple of drawings & have a few new ideas for pieces I might start. I'm starting to look at my sketch book as creating more of a conceptual journal, rather than the way I used to use it by just drawing & ironing out the details of my next sculpture. It's kind of like photography, not every picture you take is a masterpiece, but 1 out of 100 is AMAZING!!

Concept drawings of Sugar Skulls!!!

I've always loved the traditional "Day of the Dead" images. I especially love the ornately decorated Sugar Skulls. You can do so much with them. These would make great wall hanging pieces... or something even better....

Skulls Drawing


Concept for Swallow Tattoo!

Would love to make more wall hanging pieces like the Koi. I also like the graphic styles of traditional tattoo designs. I think it would be fun to make a 2-d , 3-d version of the traditional Swallow / Sparrow!

Swallow drawing

Thursday, May 13, 2010

Being Inspired!!

So the good thing (and bad) thing about finishing a big piece of art is the time before you start the next. I love the time because it allows me to clear my mind & think about what I want to do next. I usually spend a good amount of time researching ideas, or drawing in my sketch book. But also, I can never decided what to make next....


What inspires you?
Where do you get your ideas?


There are so many pieces that I want to make, but I'm not always motivated to make them. Once I make a decision, I'm good to go & will work it through. But sometimes, some of the pieces that I've been meaning to start just don't sound that fun at this specific time.


so...


What will it be...


Ugly Duckling DrawingElephant Drawing

Don't know yet, but something will light a fire under my butt!!

Monday, May 10, 2010

Koi is Finished!!

So he's all finished!! It was a dash to the finish, but I got him all done & photo'd yesterday, then went and hung him at my work today! Feels great to be done & I'm really happy with how it turned out. Here are the final picts of the Koi & what he looks like in his new home....

Koi 1Koi 5


Koi 6Koi 3

Koi 8


And I think it's funny cause when I finally hung it, it looks kinda small. When you are working on a piece (in hand) and up close, it seems HUGE... but... when hung next to giant paintings, he looks less than impressive. But he still looks cool!! Come by the Blick Art Supply Store on Beverly if you are hanging out in the Hollywood area!! He will also be listed in my shop this morning!!

Koi 10

Koi 9