Showing posts with label techniques. Show all posts

Saturday, October 1, 2011

Evolution of a Drawing!

Maybe I'll start at the beginning... Of a sculpture!

So to get back into the swing of things, I thought I'd show you part of my process.  This is a concept drawing that I did for a SUPER TOP-SECRET project that I might be working on!

Steps of drawing a Dinosaur....

Really bad sketch of idea!

My new favorite paper to draw on....
TRACING PAPER!!
Makes drawings so much easier to clean up!

Cleaned up Tracing Paper line drawing.

Transferred line drawing with some added shading.

Final drawing with some painted color & background!!  
So like I said, this is just the process of a CONCEPT drawing.  Doing a drawing like this helps me figure out the structure & anatomy of the subject.  Then when it comes to actually creating the sculpture, I can focus more on making him look awesome!

Thursday, June 24, 2010

Quick Post!!!

Got some color on the Pink Predator Munny!!! His pink armor is coming along nicely. Want to do more detail & more layers of color. His dreads aren't attached cause I want to get all his armor painted before I glue them in. Soon!!

Hopefully I will be able to finish him up this weekend!!!

Munny Update... 2
Munny Update... 1

Thursday, May 27, 2010

A Long Day of Felting!

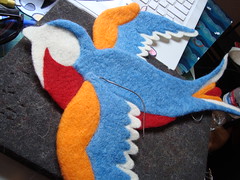
I worked most of today, it felt good to get some work done cause I've been kinda lazy recently. So I shared the first process picts for my newest piece yesterday, so I thought I'd continue! Here was today's progress picts for the Tattoo Sparrow Felted Sculpture!

Sparrow Process 1


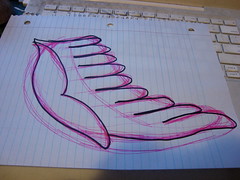
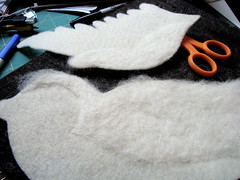
I started by sketching a pattern for the wings. I wanted both to be the same, so I made a drawing to cut the wool-felt from.


Sparrow Process 2


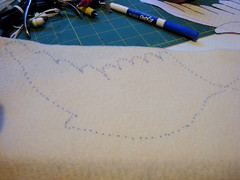
I traced the pattern of the wings on some pre-felted white wool. This is my new favorite material to make things go faster. Instead of felting wool from scratch into a thin shape, I just use the pre-felt & needle on top!!


Sparrow Process 3


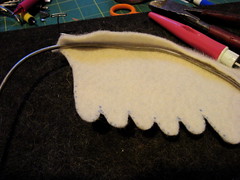
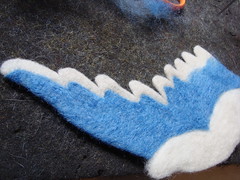
I want one of the wings to come off the base into 3d, so I felted the armature wire into the wing. This helps with support & posing.


Sparrow Process 4


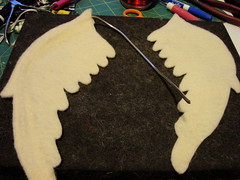
Both wings all cut & ready for color!


Sparrow Process 5

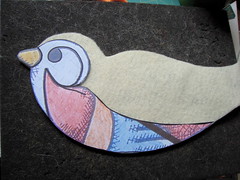
I used my handy new PhotoShop Elements to scale the original concept drawing up to the size of the wings. I like the shape of the body that I drew before, so I just printed it out to be able to use as a pattern.


Sparrow Process 6


This is another great reason to have the pattern. I cut it up to insure the shape & placements of the different colors.


Sparrow Process 7


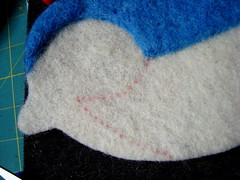
I wanted the blue color on the body of the bird to be slightly thicker than the rest, so I just added a layer of white wool to add a little bulk.


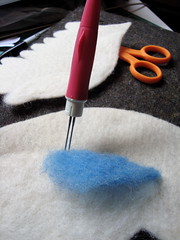
Sparrow Process 8


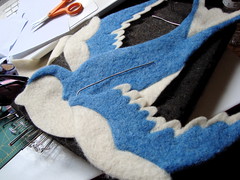
Time to start the color!!!


Sparrow Process 9


I'm a sucker for some nice clean lines & graphic elements in my pieces, so I took the time to sculpt in the colored highlights. I wanted to have some white at the bottom of the wings.


Sparrow Process 10


After much needling, I finished all the blue! It was alot of needling!!


Sparrow Process 11


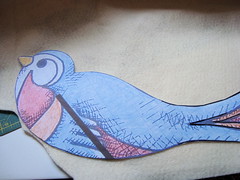
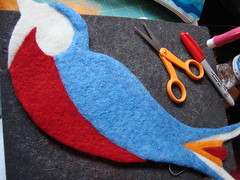
I then used the body pattern to sketch in the placement for the red under-belly color.


Sparrow Process 12


Fun color on the body is done!


Sparrow Process 14


All the color is done! Looking good!


Sparrow Process 15


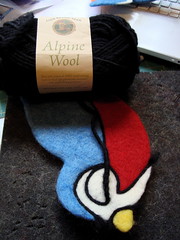
Time for the line detail! Just using my handy black wool yarn to felt in the bold black lines around the shapes...

It was a long day & I'm done working, but he is coming along nicely!!

Wednesday, May 26, 2010

I dye with iDYE!!

So here is a short tutorial on how to dye some wool using Jacquard's iDye. I wanted to start another series of process picts for my newest sculpture. So in the coming days (or weeks depending on how fast I get this piece done) I will be showing the complete process of creating my newest Felted Sculpture A Tattoo-Inspired Sparrow. Sh here is the first step....

I dye with iDye...
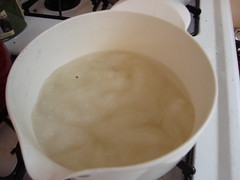
I dye with iDye 1
Start by pre-soaking your wool in a warm bath of water with a splash of vinegar. Pre-soaking your wool helps the fibers open up & gets them ready to receive the dye. It also helps with getting a nice even overall dyed color.
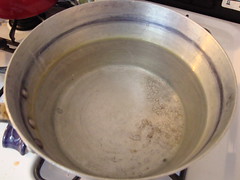


I dye with iDye 2

While your wool is soaking, get you pot of hot water started on the stove. I have a specific pot that I use for dying so that I don't make stew or something that ends up slightly blueish in color.
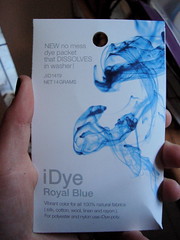


I dye with iDye 3


I wanted to dye my wool a nice blue color. Be sure to check out these iDyes cause they have so many yummy colors made for natural dyes. They are technically made to be thrown into you washing-machine, but I've found it's super easy to use them on the stove top!
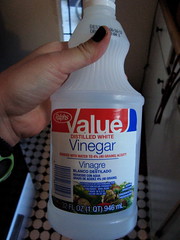


I dye with iDye 4


You will be adding some white vinegar to the pot of hot water. This is used as the dye's MORDANT, which is to help set the dye in the fibers. I'm not quite sure of all the science-type stuff on it, but it has to do with attracting the dye molecules and affixing them to the individual wool fibers. You can use this method with cotton fibers, the only difference is that you will use Salt as the Mordant!
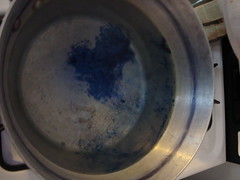


I dye with iDye 5

Now add your dye to the pot. Since you are controlling the amount of dye for the wool, you can add as little or as much depending on how saturated you want the color to be. I wanted a medium (not too light, not too dark) so I added a little bit, then added more about 1/2 way through.
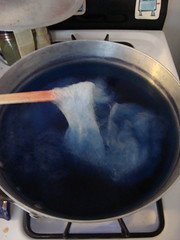


I dye with iDye 6


So add the dye, add the vinegar, then add you wool! Be sure to gently stir the wool through the time of dying. You don't want to aggressively stir the wool cause it will start to felt (which I have done) but you want to be sure to move the fibers around. This will help with getting even color coverage.
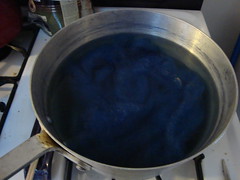


I dye with iDye 7


Now let the wool sit & cook for about 1/2 hour.


I dye with iDye 8
All dyed! You will be able to see if the dye has been completely soaked up by looking at the left-over water. It should be fairly clear. If your water is still dark or opaque, then you either added too much dye & your fiber can't take anymore, or you need to leave it in the water for longer. I've also just pulled wool out after a short time cause I wanted a lighter color *This may cause bleeding because the dye has not had time to set.
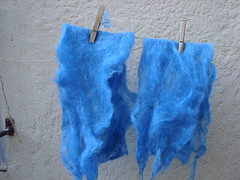
I dye with iDye 9
All done & just hanging up to dry. Should be ready for me to use tomorrow. I have a home-made clothes line hanging outside my window with some twine & clothes pins. Not that pretty or strong, but just perfect to hang tufts of wool!!

I love dyeing wool because I get to control what colors I make, but also get surprised & inspired by anything that I wasn't expecting!

Thursday, May 6, 2010

More Koi Picts!!

Almost done... Got all the main parts done, just gotta finish the details & paint his wood base & mount him on!! I'm super excited & want to be done!!! Ready to move on to the next piece!!

I also am excited about my new toy!! I bought myself a Fancy-Shmancy Jigsaw. I've needed one for a while, and this project gave the best excuse to buy one. Went with the middle-grade one (rather than the super cheap or super expensive). I think it'll come in handy cause I'm dig'n making wall-hanging pieces. I think there might me more of a market to sell sculptures that hang on the wall. At least people might not ask me "What is it for?" anymore. These piece have a purpose... hanging on the wall... and now maybe I can open my buyers into people that buy paintings & prints to decorate their houses.

I used the jigsaw to cut out the wooden base for the Koi. I just laid it down on the wood & drew a nice outline around it. It will be painted black, have some armature wire to hold the tail up, & have the hanging hardware on the back.


And here are the Picts of the Koi!!

These are of the Koi before his last round of paint & after I attached the fins. You can see how he will be sculptural - going from his flat head to full 3D tail. To give you a bit of scale, the piece of wood that it is sitting on is 2' x 4'. I like how it is turning out!!

Koi Progress 8Koi Progress 10


Koi Progress 9


These are the picts of Koi after his final paint job! Now he just need a bit more detail.

Koi Progress 11


Koi Progress 12

Monday, May 3, 2010

Koi Progress Pictures!!!

Sorry I haven't posted in a while. I am feeling sooooo much better & even got a ton of work done on my newest felted sculpture! I thought I'd share some more progress picts of the Koi Hanging Wall piece that I have been working on. It's almost done, just gotta attach the fins, finish any additional detail & painting, & make the supporting wood piece to allow it to hang on the wall!! I'm super excited about how he has been turning out, and hopefully will finish him this week, then show him at my work!!


Koi Progress 1

This is what the koi looked like when I finished felting & sculpting and before I started airbrushing any color or shadows. I used the iDye in Sun Yellow (maybe... don't remember exactly which color it was), but I LOVE those dyes!! When my parents were in town last weekend I totally talked my dad into buying me like 5 more colors! Now I have the whole rainbow!!


Koi Progress 2

Here's the Koi with his first layer of color. Started with a bright orange for shading & overall color. I dyed him yellow at first to allow plenty of light highlights.


Koi Progress 3

All the parts finish painted (for now). Now just need to attach the fins, that's gonna be tricky, but I'm sure I'll figure something out!!


Koi Progress 4

Love how the shading on the scales turned out!! He's actually much more brilliant orange than these pictures show.


Koi Progress 5

Detail of face & scales. I'm not sure about how "airbrushed" his face looks right now... may need to work on that just a little bit more.

Monday, March 22, 2010

*new* Jacquard iDye!!!

So we just got this new product in at work & I am so excited!! We just got the iDyes by Jacquard in and they look like they have alot of potential! As you all know I'm a huge fan of dying my wool with Kool-Aid. It's way non-toxic & easy & not that messy. But am seriously limited to the colors available (I guess kids only like to drink Bright & Fruity flavors instead of ones like "olive" or "gun metal"). I've also played with the WashFast Dyes by Procion, but there are way too many chemicals to help set the dye & it can be quite a production to dye a batch.

But Now....

There is Jacquard's iDye!!!!


I was so excited because these dyes come in so many Yummy colors! Plus they are really easy to use. They are the kind of dyes that you are supposed to just drop in the washing machine and just add some Vinegar, but they do include instructions for stove-top dying. I just cut the pack open and added a little of the powder to my pot & dyed away!! I tested the dye on this little turtle (sorry for the bad picts) I made for my niece's birthday next week! With just a tiny bit of the powder, the color was super bright!! I think once I get a little money in the bank from my Movie Job, I will have to invest in all the colors!!


These are definitely worth a look at if you like to dye your own wool. I will be trying on my next big piece this week (mini-Angler) and will post picts of the outcome!!

Available at your local Dick Blick Art Supplies Store ;)

*Had to add this in cause that's where I work!!!
**They also make a iPoly Dye. The original iDye is for natural fibers, but the iPoly is for synthetics!!


Picts of the new Display at work!!

mmm... iDye...

...

Wednesday, February 3, 2010

Snakes & Cupcakes are No Joke

Today's post is full of in-process PICTURES!!! YEA!!! So to start it off here are a couple of pictures to prove that I am super serious about CupCakes!!! Here are a couple of working photos of the new slew of Cupcakes & Cherries that I'm finishing up!


New Cupcakes Process


Don't forget...
Enter to Win your very own Felted Cupcake Here!!!!
Still got plenty of time to enter, getting off to a great start!!


And also included in this Picture Post today is a series of Photos that show the Airbrush Painting process from my newest Felted Sculpture!! It's a custom piece that I did for my brother (actually it's the first "celebrity" piece I've done, and hopefully will have picts of said celebrity and the snake in a couple days!) He's a Black Mamba Snake!!! Very cool, the snake is kinda boring, but had fun doing all the shading & painting!!


Process of Painting Snake 1Process of Painting Snake 2


Here is the snake all plain & white needle-felted Romney Wool. 99% of all the sculpting was done before I started to paint him. So, got the airbrush out & mixed the watery acrylics & was ready to go!


Process of Painting Snake 4Process of Painting Snake 3


Started with a yellowish base color all over the snake. Wanted to have the under color to be warm instead of white.


Process of Painting Snake 6Process of Painting Snake 5


Dark brown was next. This is the start of the dark shading & super dark body color on the top. You can see how I started to shade the top scales while trying to leave the lighter space in between.


Process of Painting Snake 7Process of Painting Snake 8


BLACK BLACK!! Yea, He's starting to come to life!! This is the first of many, many layers of Black color for the body & even more shading.


Process of Painting Snake 9Process of Painting Snake 10


After many layers of black, he's almost done!! I like how his scales turned out with the lighter lines between the diamond shapes. I was trying to make him pretty realistic (well, a little general, but has all the details. I've been trying really hard to work on adding uber detail cause many of my favorite felting artists are those that make tiny super fine detailed sculptures! So Jealous!)


Process of Painting Snake 12Process of Painting Snake 11


So here he is!! Added a few details on his face to help make it pop. He turned out pretty cool, wish the subject was a bit more colorful, but hey, this is what the Black Mamba looks like, so whatcha gonna do?


Process of Painting Snake 13


This is his done & shaded under belly!! Like the ridges!

Don't forget about the BLOG GIVEAWAY!!!

.