
*Be sure to keep an eye on my gloves, I think they are the best indicator of how messy the process was!!
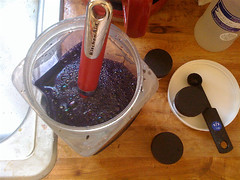 I started by mixing up a big batch of Prochem WashFast Acid Dyes according to the direction for Dyeing Wool Carpet. A link to the directions is here:
http://www.prochemical.com/directions/WF_Carpet.htm
I think I mixed way too much dye , way too dark... oh, well...
 I tried some experiments with different ways to apply the dye on some old Easter Eggs. I found that a brush doesn't really get the dye into the deeper layers of the fiber. I ended up going with an industrial spray bottle and then massaging the dye into the wool with my hands & a towel. You are supposed to apply the dye really hot, but I don't think I did... oh, well...
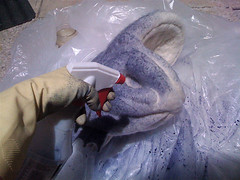
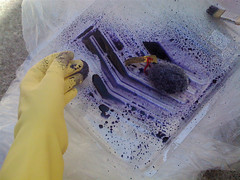
Here is me spraying the first, lightest color all over the fish. It went pretty fast, spray & rub. It looks like the dye kinda sat on top until I rubbed the surface & worked it deep into the wool.
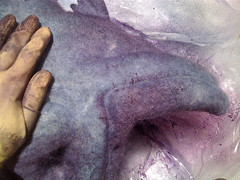
 Here he is all light bluish. It was a shock to spray it cause I'm always nervous when I start a new step. I was scared that it wouldn't turn out to be the right color (which it didn't). But also you kinda gotta go with it, and let the dye do what it wants, I am way more open to color variables than with the sculpting. It's just because I'm not as good at it. I'm sure I'll get better and will be able to control it more soon.
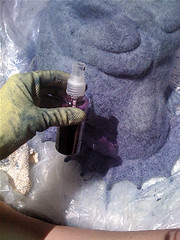
This ended up being my favorite tool of the day. It's a tiny travel-sized spray bottle. It had a more concentrated & controllable mist than the industrial sprayer. It still got in places that I didn't want it to, but whatever. I kind of used the baby sprayer like an Airbrush. I think I might even try using my dusty old airbrush for the next project. I can get super control with the airbrush & apply more detail with just the dye. With this baby sprayer I kinda just sprayed & went with the flow of it.
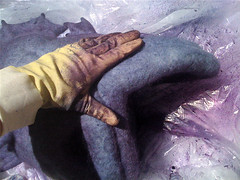

Here is the way I compared how I used the baby sprayer as an Airbrush. I used my hand as a kind of mask to control where I wanted the purple dye to go. I was spraying the lips, but didn't want it to go all over the body. I covered the body with my hand, spritzed the purple on, worked it in with a little towel action, and VOILA!
I like him at this point!! The 2 colors are looking pretty good. I like the color & shading....
BUT...
Then comes the dark...
FYI- A little dark goes along way...
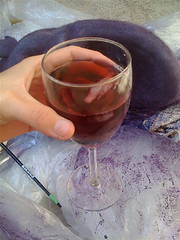
Time for a Boxed Wine Break!! Not as healthy as a Banana Break, but it was soooo after 5 o'clock, so I figured why not. Now that I think of it, this could have been the cause of my overzealous use of the dark... oh, well...
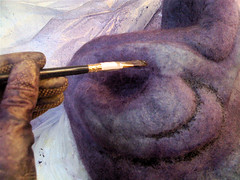 I started by using a brush to apply the darkest colored dye. I think this didn't work very well because when I rubbed it on, the dye came off & it turned a little gray color. You are supposed to apply the dye at like 150˚, which I so didn't. I did microwave the dye to make it hot, but I'm sure it cooled down by the time I was working with it. This means that the color was kinda just sitting on top, so was coming off. This is how I ended up using so much dark...
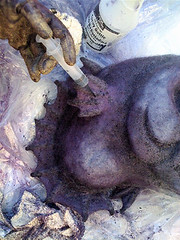
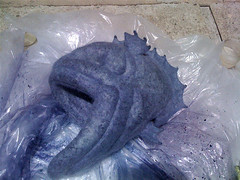
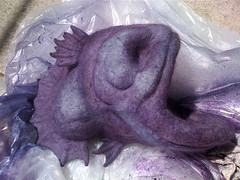
I ended up using the baby sprayer again, and also this little craft syringe. The craft syringe was great cause it applied a kind of concentrated line of color. I used it in the deepest creases & along the spines of the fins. He is way darker than I first imagined, but then again, in real life Angler Fish are almost black to help them hide in the deep dark ocean.
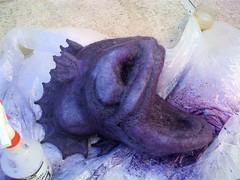
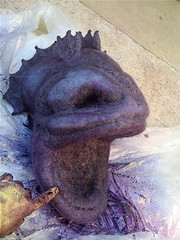 So here he is all dyed & pretty. I think I might try and sponge some of the dye off with a wet kitchen sponge before I steam-set him. I think since the dye is way not set into the wool, I can lighten him up a bit. I do like the way he is shaded, but wish he had some more of the lighter blue areas. We'll see. It was fun though, and with every new step I get bigger & better ideas for the next project!!
I Love It! The color is perfect. It has the look of shiny scales! I can't wait to see him finished. The led light lure sounds sooo cool!
ReplyDelete