
I just couldn't wait to share how I ended up finishing him off til Monday, so I'm posting today!!! I am currently steam setting the dye, which is going alot slower than I thought, I might have a good idea with that, but I'll have to work on it & then share it on Monday.
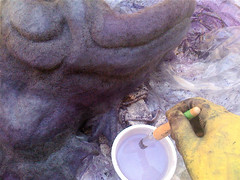
I started with a cup of clean water and a "Stencil Brush". I used this brush cause it has a big flat scrubby end. It also pretty stiff, so you can really get the water down into the wool.

Then I brushed the water on to the areas that I wanted to lighten up. These areas were pretty much all of the high or tallest ares, like the eye brow, around the outter most of the lip. Then I also lightened the fins to help pop the darker spikey parts.
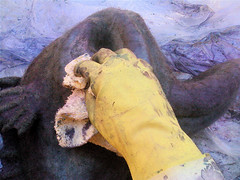
So I scrubbed the water on in a very uneven way, I used kind of a stippling movement, or kinda like dotting the surface with water. I didn't want a hard line, but more of a gradation of color. Then I blotted the water with a towel which took up the wet dye.

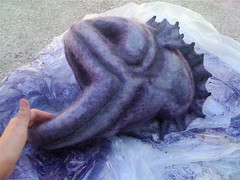
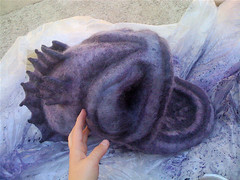
I like how he turned out!!! I think he looks alittle more scary and skeletal. The harsh shadows really push back those deeper parts & pop up the highlights. I like the fins to, now you can see the spikey parts. I'm very excited with how he turned out. Next step- steam set the dye, so that if he happens to get wet again he won't get dye everywhere. Then onto needle-felting more. He got pretty fuzzy with all of the scrubbing, and the I get to add the "fishing rod", his teeth, and some accents colors!!!!
He looks great and I appreciate the photos of the steps...I am a very visual learner .
ReplyDeleteHave you considered adding a tiny light bulb on his "fishing pole" and wire leading into a batterpack in his tummy ? You could probably find something like that a Axman or Radioshack .
Already a step ahead of you!! Got the blue LED & battery parts all ready to go, but was waiting til the end to make it so it doesn't get that wet with the dyeing process.
ReplyDelete