
How-To Wet Felt Easter Eggs!!!
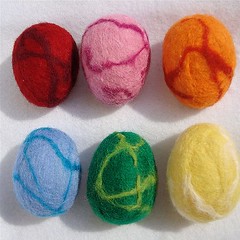
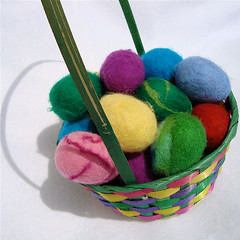 This is a collection of the Felted Eggs that I have made that are currently for sale in my Etsy shop. But if you are intested keep reading & learn how to make your very own Wet-Felted Easter Eggs. This is a great crafty projects that you can even do with you children!!!
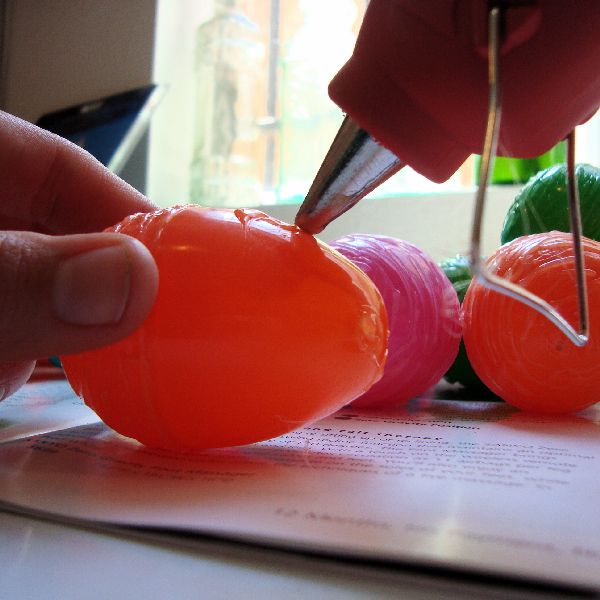 Start out with some regular ¢99 Plastic Easter Eggs. I like to hot glue the center seams to help keep the water out (but if you don't the water should seep out eventually). I also add wavy hot glue lines all over the surface of the egg. In my mind I think this helps felt the wool from the inside out. With glossy plastic, the wool is all slippery, so this helps keep everything in place.
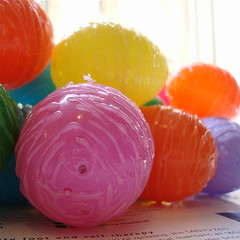 A group of Hot Glued eggs that are ready to be wrapped in wool & felted!!!
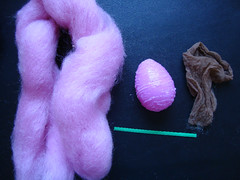 These are the supplies that you need to get you eggs ready to wet felt. I have some wool roving (pink dyed wool that you can get from some craft stores or online), the egg, a piece of nylon panty hose that is cut and tied off, and a twist tie (I stole mine from the grocery store produce aisle).
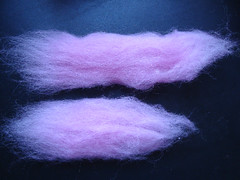 Pull off 2 tufts of wool from your rope of roving. The longer piece in this picture is about the length of my hand. These will be wrapped around the egg to be felted later.
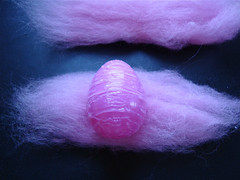 The shorter tuft of wool will be wrapped around the width of the egg. This is the shorter distance.
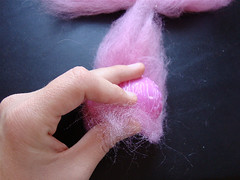
Start to roll the egg into the wool...
 Finish with rolling the length of the wool. Be sure to hold this piece tight because it will unravel quickly. Keep one hand on the rolled wool at all times.
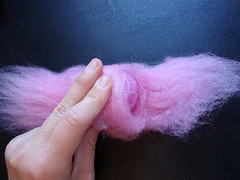 Now you will wrap the other piece of wool around the length of the egg. This will wrap in a perpendicular direction as the first tuft. This difference in direction helps in the felting process by having the fiber crossing each other.
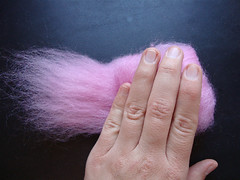
Wrapping....
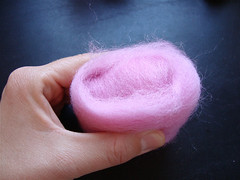 A done wool wrapped bun-of-a egg. Be sure to keep your hand on this or all your rolling work will unravel.
**I guess you should do this step before you wrap your egg, but whatever.
 Now's the time to add an accent color to your egg if you want. This tutorial will show you how to make "marbled" eggs.
Pull a small tuft of wool off of a contrasting color of wool roving.
 Take a tiny wisp of wool and place in one hand. You will now slightly felt it into a "vein" of the marbled felt.
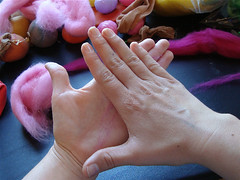 Roll the wisp of contrasting wool in your hand like you are making a clay snake. Remember you when you were a kid & you rolled clay between you hands really fast to compress the clay & extend it into a cylinder. Same idea!
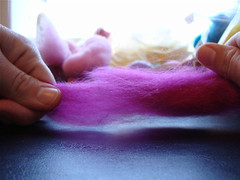
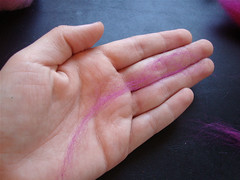
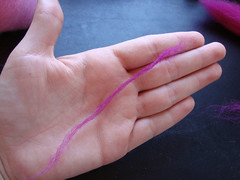 Here's a thin line of slightly felted wool. If you left the wool wispy, it would be more blotchy and less defined.
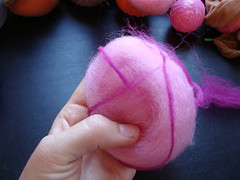 Wrap several lines of contrasting wool around the egg in a random way. This is the fun part because you never know exactly how the different colors will come out in the end. You could add larger flat wisps to vary the base color, or chunky small pieces of wool, whatever you feel like adding to the surface!!!! HAVE FUN!!!!
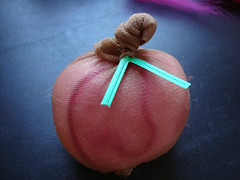 Now place you egg inside the piece of nylon & tie it off with the twist tie. The nylon will keep all you wool in place while you start the felting process. It keeps everything contained, if not, you wool would just fall of in a messy, gross hairball.
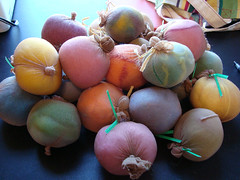
A bunch of super fun eggs ready to start felting!!!!
READY FOR WATER?!?!?!
 Now's the time to start the felting process. Wool felts because of heat & friction. Think of it kind of like your hair. When your hair is dry, the microscopic scales get all flared out & it knots easier. Well, it is essentially felting it's self (think dreadlocks). And also think of how cold water helps make your hair shiny. Shiny hair has very flat scales which reflect light!!
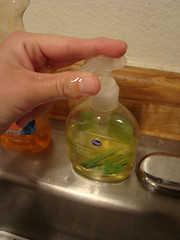
The addition of hot water & dish soap just accelerates the process.
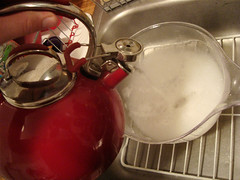 I like to use water out of my tea pot. The hotter the water, the faster the wool felts!! The heat helps expand the scales of the fibers.
***BUT REMEMBER wool will always, eventually felt, so you can use regular warm tap water with kids & it will felt just the same!!!!
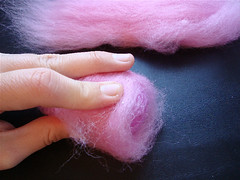
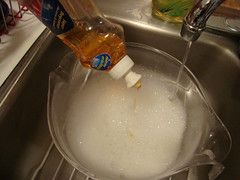
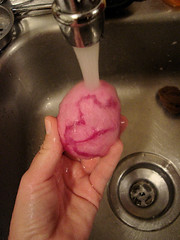
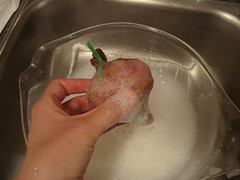 Now dunk your egg in the hot & soapy water. Get it completely wet. Now's the time to scrub, scrub, scrub... rub, rub, rub....
I have better pictures of Scrub'n and Rub'n later without the nylon over the egg, but you will massage and rub the sudsy wool for about 5 minutes.
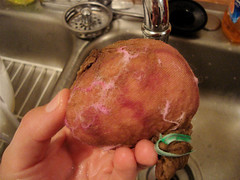 You will be able to feel when the wool is felted enough to be taken out of the nylon & directly worked with. The wool will not "inflate" or expand as much when you submerge it into the water. Also you will start to see the wool begin to pull to the outside of the nylon. The egg is really starting to felt to the nylon & it's time to pull it out.
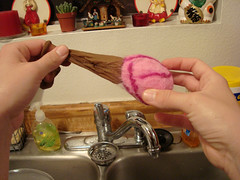 Like I said the wool is starting to felt to the nylon, so be careful when you pull the egg out. Hold the wool taught & pull the nylon off, it might stretch the wool out a little, but that's o.k., we aren't done rub'n & scrub'n yet!!!
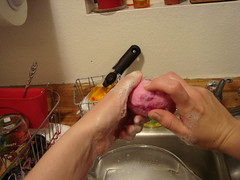
These are the pictures of how I "Rub 'n Scrub".
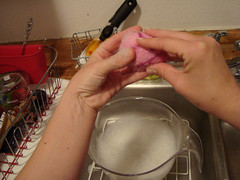 I use a move kinda like if you were scratching somebody's back, but without nails. Or maybe kneading bread dough, or playing and mixing different colors of Play-doh.
Scrub, scrub, scrub.... rub, rub, rub....
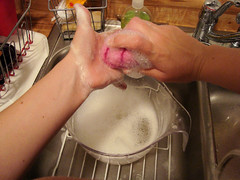
 Adding a little bit of hand soap will help thing along quite well. I guess there is a point where you can add too much soap, but I haven't found that yet!! I just add a tiny drop of handsoap when it feel like the wool is starting to stick to my hands & isn't as slippery.
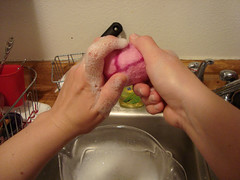 This move I love!!!
Because of the hot glue wavy line I added to the surface, I think using a twisting motion with the wool works well. Think about twisting the egg under the wool. The wool doesn't move in your hands, but the egg twists inside. This is where the hot glue ridges felt the wool and it tightens up overall.
Twisty, twisty, twisty....
Don't forget the ends!!!!
 I think that the wool is done felting when I feel that it no longer expands when dunked into the hot water. If it still feels a bit spongy when you completely submerge it into the water, then KEEP RUB'N & SCRUB'N & TWIST'N!!!!
I find that I keep felting for about another 5 minutes.
When it's nice and tight, I like to rinse it in COLD water. This kinda shocks the wool & it tightens up even more. Rub 'n Scrub 'n Twist just a couple more times...
AND YOU ARE DONE FELTING!!!
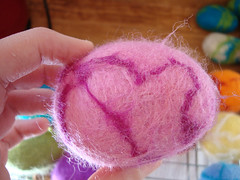 YEA!!! You have just wet-felted your first egg. I like to dry mine on a cookie cooling rack. It lets air flow all around, but you can also dry on a towel (if you rotate it often) or outside on a sunny day.
Don't worry if your egg is a bit fuzzy. All the Rub'n & Scrub'n is good for felting the wool on the inside, but it also roughs up the wool on the very outside.
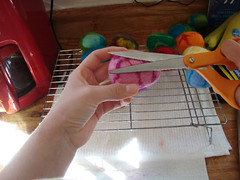 So to help with the fly-aways, I like to give my felt a little "hair cut" Just take a sharp pair of scissors & trim the very outside, fluffy, wispy hairs of wool.
ALL DONE!!!
Congrats!!! Great job!!! Have Fun!!!!!
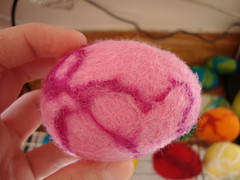
 And here is that Pink Marbled Easter egg with his friend.
(shameless plug) These specific eggs are available in my shop to buy & own if you are too lazy to make you own!!!! HAHAHAHA!!!
Set of 6 marbled Wet-felted Easter Eggs - $18
Thank you for the thorough instructions! I was looking for some good instructions because I will be trying this with my 3 year old this Easter. This will make things a lot easier!
ReplyDelete