Have to give credit for these fellow felters and their Felted Vessel tutorials that inspired me and gave me some ideas on how to go about doing this....
Zed of the UK Flickr Tutorial
SpiderFelt Blog Tutorial
Lexis on Craftster.org Forum
 These are the materials you will need for your felted vessel:
- A pair of Nylon Stockings
- A towel to soak up all the water (you will use alot!)
- You felting form
- Some fluffy wool (I used layers of core wool, then white Romney)
- A spray bottle filled with Hot Water & some dish soap

I first started by creating a shape to felt over by crumpling up some Newspaper and then covering it with clear packing tape. I wanted a custom cylinder shape, but you could pretty much use any shape you want. You can felt over a bowl, or basketball, or balloon, or probably even a styrofoam shape. Anything works (as long as it's water-proof, which is why I used the packing tape to seal the paper in).
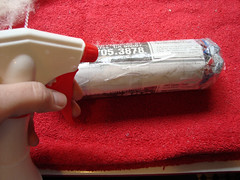
Felting with raw wool roving can be a bit sticky, literally. If the wool is not wet, it will sticky to your hands. I tried to help the layout of the wool a bit by wetting the form first. You can get the fluffy wool to stick in place if the layer below is wet.
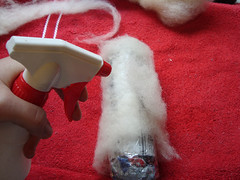
Now it's time to start putting down the layers of wool. You want to layer the wool in alternating directions. So I first pulled the wool into thin tufts & placed them down running the length of the form. Then spray it down with you hot, soapy water.
*You can use colored wool while putting down the layers! This is where you might come up with some awesome color schemes, like having the inside a different color than the outside. You can also use more wispy tufts of colored wool to create shading or flowing colors. Have fun with this step, be creative!!!
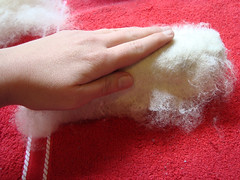
The best way to get the fluffy wool stuck down is to pat is. You don't want to start rubbing the wool because the fibers will slide around, and then you might end up with uneven felt. So just pat the wet wool down till it gets completely saturated with the soapy water.
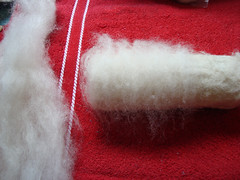
I laid out 3 layers of Core wool (in alternating directions) then I started on the Nice White Romney layers. I want a pretty thick, strong piece of felt in the end, so I laid out a total of 6 layers of roving. It's pretty thick, I think you could use less. But the thicker the felt, the stronger your vessel will be, and it will be able to stand up on it's own. **Notice the different direction of this layer, going width ways around the form.

Be sure to watch your edges. When I was finish with all the layers, I pinched & tucked in the fluffy edges of the form. My cylinder has 2 open ends to help with incorporating it into the fish later, but you could just close off one end & you get an awesome vase or tube! Just be sure to layer the bottom with alternating wool while you are laying out the sides. This way it will be connected well.
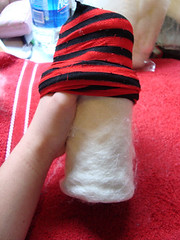
Now, the trickiest part of the whole project. You might want to get a friend to help you with this one (depending on how big you vessel is). Sorry I only had a pair of red & black striped tights that were big enough to cover the cylinder!! **CAUTION!! Be careful when you put your piece into the stocking. You don't want to disturb the fibers too much, they have not begun to felt yet, and they could slip & slide around messing up all your hard layout work!!

There! My felted piece all tied up in the nylon stocking!! Looks kinda like a sausage, a giant sausage!!

Finally time for some felting! Wet your wool form with some really hot water (hot water and frictions are the recipe for faster felting!) Add some more soap, I use regular liquid hand soap when I felt, but many professional felters use different kinds. I can't tell the difference between dish soap & hand soap, so I don't think I need to invest in some fancy expensive Olive Oil soap, although if you are a professional, I'd like to hear your thoughts on soap choice!

Rub & Scrub... Rub & Scrub... Time to get down to felting. I love wet felting cause it's kind of mindless & I enjoy just working with the fibers & rubbing & scrubbing. It's pretty easy to felt at this stage cause everything is contained in the stocking, but be sure to use a light touch at first, the fibers can still move around. As you feel the wool firm up, you can use a more aggressive rub & scrub.
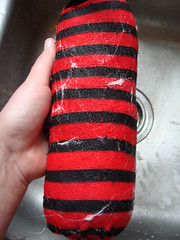
You will be able to see when your vessel is ready to take out of the stockings because you will see fibers start to come through. You want the outer layers to be felted fairly well before you take it out (it will be unruly & might get out of shape if you take it out too soon). Don't worry about the inside not being felted as well, we will take care of that in a couple steps.
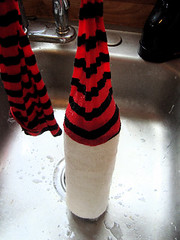
Another Tricky step!! Be careful as you pull off the stocking. The fibers that are peeking through the stocking is in fact the vessel being felted TO the stocking. Pull the stocking off your vessel slowly, making sure not to pull apart the felt. Mine came off pretty easy (I tend to over-felt things), but you might have to finesse your nylon away from the felted wool.

You can continue to Rub & Scrub the exposed wool at this point till you feel that it is pretty strong. Then you can take out your shaped form.
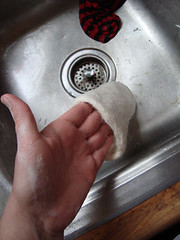
Now it's time to focus on the inside wool & felt that a bit. I started by rubbing & scrubbing the inside with my hand. This can help get the surface layers felted down so that you can really get down to some aggressive felting.

You can turn the vessel inside out! This will definitely get those inner fibers felted down!
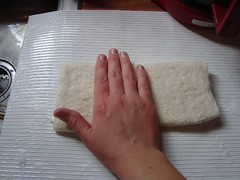
I used my trusty felting mat to get some fast felting done! Just rub back & forth over the mat.
*Felting tip - while you are felting at this stage (which is technically called fulling because you are shrinking & tightening the fibers) the piece will shrink in the direction you rub in. i.e. - If you felt the down the length of the vessel it will become shorter.

Almost done!! I like to rinse out the soap from the wool by using alternating HOT & COLD water. I feel like when you shock the wool with the temperature change it tightens up the felt. Be sure to rinse out all of the soap, you don't want to have stinky rotting wool later on!
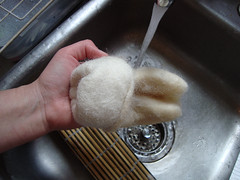
Turn it right-side-out & you are almost done!!! YEA!!!
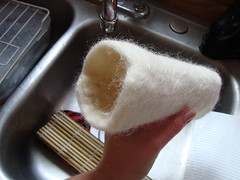 Now's the time to shape you vessel. As long as your wool is thick enough, your felt should be able to keep it's shape as it dries. You can put the vessel back onto your form (althought it might have shrunk a bit & won't fit) or wad up some towels or paper to put into the vessel as it dries. Your vessel should keep it's shape and be able to stand on it's own after it dries!!!
This was a pretty fun project & I think I might take advantage of it as I get more complicated with my felting sculptures. I have some pretty giant ideas & having hollow shapes might come in handy.
Hope you enjoy this tutorial, It took me FOREVER to write up!! Stay warm & have a great day!

Thank you for the time and work you put into this tutorial.
ReplyDeletethank you very helpful!
ReplyDeleteI l live on an alpaca farm and just made a vase using these instructions from their fleece! Thanks so much!
ReplyDeleteI know this is an old post but I stumbled upon your tutorial and have a question. If I wanted to add a bottom to the vessel, how would I do so? I'm thinking I could needle felt the bottom but am not sure.
ReplyDelete