
JellyFish -
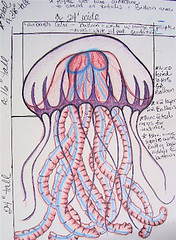
So here's a drawing of the newest sculpture I'm working on. I've been working on it for about a week, and honestly, could be pretty much done by now, but I'm lazy. The real sculpture doesn't look much like this anymore, due to some restrictions with the electronic parts. He will have glowing wire inside the tentacles. It's made of this awesome coated wire that glows blue when turned on. It'll be awesome, trust me....
MY NUNO FELT TUTORIAL -
So I'm not sure if this can technically be called Nuno felt, maybe I just don't felt it enough to be proper Nuno, but it is based on the same idea. Felting a thin layer of wool over & onto a fabric base. I wanted some transparent felt that I could use to make the JellyFish, so I tried my hand at Nuno. For every new sculpture I like to try a new technique. I think I like to do this cause then it just adds one more tool to put into my felting belt. Then I can pull these different techniques out of my butt later when I need them!!!
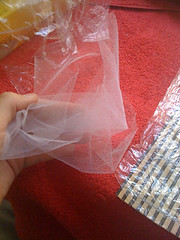
I used a small weave of white Tulle as my fabric base. I figured that the wool would be able to work it's way through the open holes in the netting. I cut the tulle into smaller, manageable sized pieces. This whole process goes really fast, well the actual felting part does, & I think it helped me practice wet felting more.
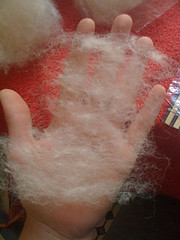
Now I took my trusty White Romney wool (which I need to reorder cause I'm almost out) and pulled it out into VERY VERY thin tufts. I tried to keep it very even & about the same thickness, pulling out all the chunks of Veggie Matter & felted knots. This part takes the longest, but if you work carefully at the start, it makes the rest of the process really easy.
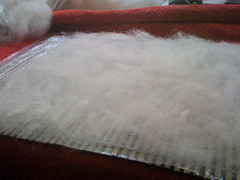
All the thin white Romney laid out in a thin layer over the Tulle. I also was sure to put a sheet of Plastic Wrap under the Tulle before I started. This just helps keeps all the water & wool & mess contained. I put another sheet of Plastic Wrap over top of the wool, to help keep the fluffy tufts in place while you felt.
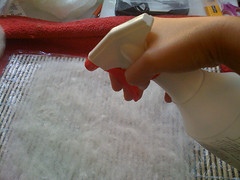
Now I used a spray bottle to squirt a mist of warm soapy water over the wool. The mist doesn't disturb all your hard work of laying out the layer. Now put the Plastic Wrap over top & press out the air.
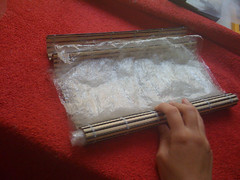 Now it's time to Roll, Roll, Roll....
Be sure to roll & unroll the felt in the Bamboo Sushi Mat, turning it in all different directions, and flipping the felt over. This just makes sure the wool gets felted in a even manner. I found also that if you want to make a larger piece of felt bigger than the mat, you can fold it in half. Be sure to unfold & refold the wool here too. Takes a little longer for it to felt, but not bad.
And I'll leave you with a SUPER FUN GIF animation, just cause I think they are funny!!
Create avatar
Cool! I can't wait to see your Jelly fish! I love the nuno felt idea!
ReplyDeleteThanx! He's actually looking much better in sculpture form than in drawing. That's usually how it ends up! Will have picts to share in a couple of days!! Probably done by Monday!
ReplyDeleteThis is way cool!
ReplyDelete