
Ok, if you have read my blog for any amount of time & you've looked over any of my tutorials, you'll know that I am ALL ABOUT finding a easier, faster way of doing things. It's not that I want to skimp on quality & rush through my felting, but I just think to myself,
"There has to be a better way of doing this...."
So, for now at least, I think I've found a reasonable solution to speed up covering foam & "core wool" bases with the nice top wool layer. If you checked out my Angler Fish posting, you noticed how frustrated I got at the wet felting stage. It was basically a giant mess trying to felt all of that wool on top of the foam. It was soggy & limpy & took forever. Well... I figured out the awesomeness of Pre-Felt!!! Pre-Felt will be a life & time saver. Many of the wet felters have know the glory of Pre-Felt for a while, but I think this technique can be applied to those needle felters too!!! It's kinda like when you pre-felt little tufts of wool by hand before doing your top-coat. This just makes a whole-lotta tufts for you to use!!
Making sheets of thin Pre-Felt, which can easily be torn into smaller pre-felted bits can be made of any wool, in any color. I've been making sheets for a couple of days to kind of stock pile them for future sculptures. A little prep work now will save me a TON of time later. Plus I like wet felting, it's kinda a stress-reliever for me. Very Zen-like.....
*** I was just reading over my post & thought I'd add a little bit of info for you. This might not work for everybody... It works for me cause I tend to work on a larger scale than other needle-felters. I love making giant things, using lots of wool. But, if you tend to work smaller & are overwhelmed by making larger items, maybe you can see how easy it is to take a few easy steps to keep the work load manageable.
Making Pre-Felt Tutorial!!!
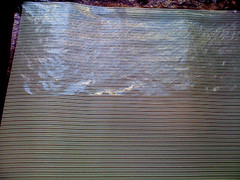

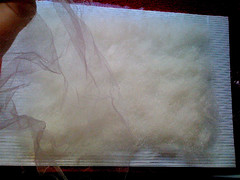
Like my new felting mat? I just got it, it works better for more subtle felting than my bamboo sushi mat. Be sure to put a sheet of plastic wrap down over the mat for clean & neat working of the pre-felt sheet. Lay out thin tufts of wool in multiple layers for your pre-felt. I use 2 layers to keep my felt thin, this is a good thickness for using for needle-felting.
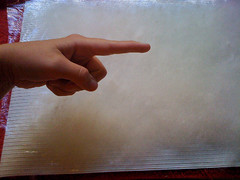
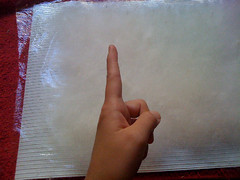
Be sure to alternate the directions of the wool fibers. Go between horizontal & vertical. Also check to be sure that you wool is even & there aren't any bald spots. Add a little extra tuft to any thin areas that might pull apart & leave you with a felty hole.
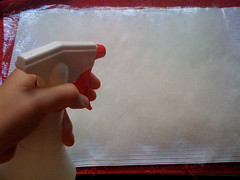
Now spray it down with some warm soapy water. Be sure to thoroughly wet the wool, I use the sprayer because it doesn't disturb the layout of the fibers. Next, cover with a layer of Tulle or netting. This also allows you to work the fibers with out disturbing the layout. Unfelted wet wool can be a bit unruly & sticky. The tulle just lets you work it in place.
Create avatar
Now it's time to SOFTY rub & scrub. You don't need to work the wool that much, for that long. You really only want to just get the fibers to mingle enough to keep it's shape. You can use a kind of vibrating motion. Small movements, back and forth, working all over the sheet.
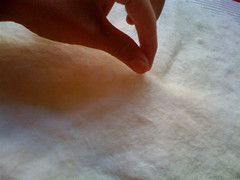
Now is what I read in a felting book called "The Pinch Test". This just lets you see how much the fibers are felted. If you pinch the very top fibers & you get a kind of peak of fibers that come up with it, then you are done! If the felt pulls apart, then work it just a little more. You kind of want a "skin" of felted fibers, not a solid sheet of felt. When done, just roll up the sheet inside the plastic wrap & rinse out the soap. I like to pour water down through the open ends & wash out the soap. Let air dry.
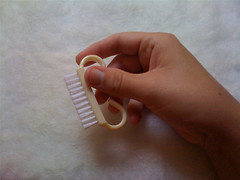
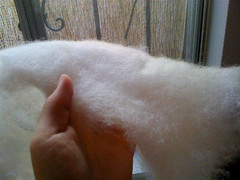
I tend to over felt my wool (always), but pre-felt is awesome cause you can just brush the surface a little & loosen the fibers. You can also thin it out by pulling it a little. Now you have a fluffy piece of feltable Pre-Felt to use for all your felting needs!!

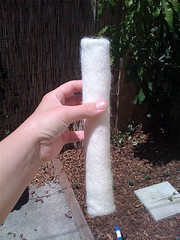
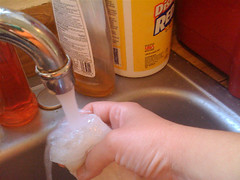
Here's an example of how I used a sheet of Pre-Felt. I took a cylinder shaped tube of foam & rolled it up inside the Pre-Felt. I needled the wool just enough to keep it in place. Then I wet felted it in hot soapy water, using my new felting mat, and in just a couple of minutes... DONE!!
Hope this gives you some ideas, & I hope everybody has a great weekend!!!
Thanks for sharing the tutorial . I am still nervous about wet felting from scratch but you made it look...not to scary .
ReplyDeleteWet felting gets easier with practice. I started out with making felted soaps & wet felting wool around small objects, just to get the feel for it. I find it really relaxing, maybe try a small project to start, then work up to making sheets.
ReplyDeleteI'm still learning & my wet felt is kinda wonky, but usable enough for what I need!!!